Are you tired of your kitchen lacking style and functionality? Do you dream of having a beautiful kitchen island to gather around with family and friends? If so, you are in the right place! In this blog post, we will show you how to make a kitchen island out of base cabinets, adding both character and convenience to your space. Whether you are an experienced DIYer or a novice with limited tools, our step-by-step guide will provide you with all the information you need to transform your kitchen into a place you will be proud to show off. So get ready to roll up your sleeves and let’s dive into the world of creating a custom kitchen island that perfectly suits your needs and style!

Materials Needed
Before we begin, here are the materials you will need:
- Base cabinets (measurements depend on your desired size)
- Plywood or MDF board
- Countertop material (such as butcher block or granite)
- Screws
- Drill
- Screwdriver
- Saw (circular or jigsaw)
- Measuring tape
Benefits of Adding an Island to Your Kitchen
Before we jump into the tutorial, let’s discuss some of the benefits of adding a kitchen island to your space:
- Extra counter space: Whether you’re cooking for a large group or simply need more room for food prep, a kitchen island provides additional counter space.
- Storage: By using base cabinets as the foundation of your island, you’ll have plenty of storage options for your kitchen tools, appliances, and other items.
- Versatility: A kitchen island can serve multiple purposes – from a breakfast bar to a dining table or even an extra workspace. It can also be moved around if needed.
- Aesthetics: Adding a custom kitchen island can enhance the look and feel of your kitchen, making it more visually appealing.
Now that we’ve covered the benefits, let’s get started on creating your own kitchen island!
How to Make a Kitchen Island Out of Base Cabinets In 9 Steps Guide
Step 1: Gather Supplies
The first step in making a kitchen island out of base cabinets is to gather all the necessary supplies. You will need a set of base cabinets, wood screws, wood glue, clamps, sandpaper, saws, and other tools. You may also need additional materials such as countertop material and hardware for attaching the countertop.
Step 2: Measure the Space
Before you begin building your kitchen island, it’s important to measure the space where you plan to place it so that you can ensure that your cabinets will fit properly. You should also take into account any other furniture or appliances that may be nearby so that you can leave enough room for them as well.
Step 3: Assemble the Cabinets
Once you have gathered all of your supplies and measured the space, it’s time to assemble the cabinets. Start by laying out all of your cabinet pieces on a flat surface and use wood screws to connect them together. Once they are connected securely, use wood glue to reinforce any weak joints or connections.

Step 4: Attach Legs or Casters
Depending on how high off the ground you want your kitchen island to be, you may need to attach legs or casters to the bottom of your cabinets so that they can be easily moved around if needed. Make sure that whatever type of leg or caster you choose is securely attached with wood screws before moving on to the next step.
Step 5: Sand Down Any Rough Edges
Once all of your cabinets are assembled and secured together with legs or casters, it’s time to sand down any rough edges using sandpaper and a sander. This will help create a smooth finish for when you apply paint or stain later on in the project.
Step 6: Apply Paint or Stain
Now that all of your rough edges have been smoothed down with sandpaper, it’s time to apply paint or stain depending on what look you are going for with your kitchen island design. If you choose paint, make sure that it is suitable for use on wood surfaces before applying it with a brush or roller according to manufacturer instructions. If staining instead, make sure that all surfaces are clean and free from dust before applying multiple coats as necessary until desired color is achieved.

Step 7: Attach Countertop Material
Once everything has been painted/stained and allowed adequate drying time (following manufacturer instructions), it’s time to attach countertop material such as granite tiles or butcher block wood onto the top surface of the kitchen island base cabinets using wood glue and clamps per manufacturer instructions until secure and dry according to product guidelines.
Step 8: Install Hardware
After allowing sufficient drying time for any adhesive used in attaching countertop material (following product instructions), install appropriate hardware such as handles and hinges onto cabinet doors if desired following manufacturer instructions until secure..
Step 9: Place Island in the Desired Location
Finally, once everything has been installed correctly according to manufacturer instructions, carefully move the kitchen island into the desired location within the kitchen making sure not to damage walls, floors, etc. And enjoy!
How Do I Secure the Island to the Floor?
If you’re looking to spruce up your kitchen and add more counter space, building a kitchen island out of base cabinets is a relatively simple and affordable DIY project. However, it’s important to ensure the island is securely attached to the floor before using it to prepare meals or entertain guests. To do so, start by measuring and marking the placement of the cabinets on the floor. Next, attach wood shims to the bottom of each cabinet to ensure a level surface, then secure the cabinets to the floor using screws and construction adhesive.
Finally, add a top surface of your choice and a coat of paint or stain to complete your new kitchen island. By following these steps, you can enjoy your new island with confidence knowing it is securely fastened to the floor.
Additional Tips and Idea
- Consider adding shelves or drawers to your kitchen island for even more storage space.
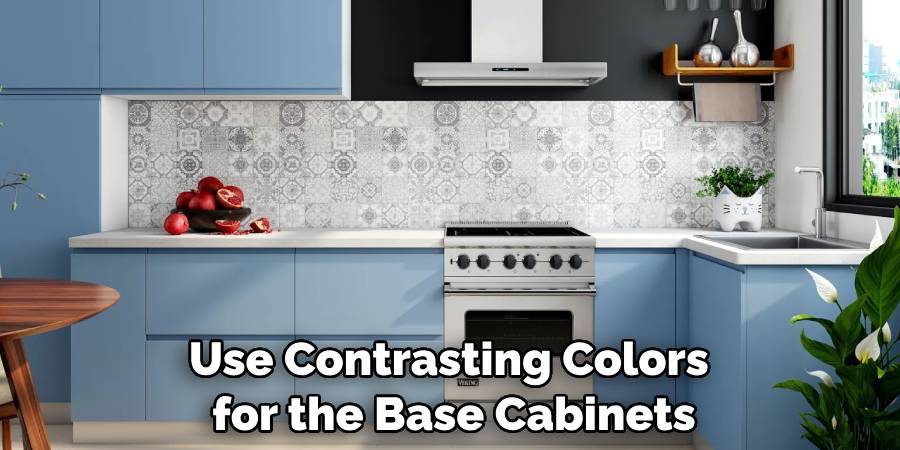
- Use contrasting colors for the base cabinets and countertop material to add visual interest to your kitchen.
- Add a bar-height overhang on one side of the island for additional seating area.
- Incorporate decorative elements such as beadboard paneling or decorative molding to give your kitchen island a personalized touch.
- Don’t be afraid to get creative and repurpose old cabinets or materials for your kitchen island project. The possibilities are endless!

Frequently Asked Questions
What is the Best Way to Attach the Cabinets Together?
When putting together your kitchen or bathroom cabinets, the last thing you want is for them to start coming apart after a few months of use. That’s why it’s crucial to choose the best method for attaching your cabinets together. Many modern cabinets feature a range of different fasteners, such as screws, dowels, or adhesives. While all of these methods can work, the best choice will depend on your specific needs and the type of cabinetry you have. For example, if you’re working with heavy, solid wood cabinets, glue and dowels may be the best option for providing maximum strength and durability. Whatever method you choose, make sure you follow all the manufacturer’s instructions carefully to ensure a secure, long-lasting installation.
How Can I Prevent the Island From Tipping Over?
While preventing an island from tipping over may seem like a daunting task, there are actually several solutions. One of the most important steps is making sure that the island is anchored securely to the floor. But, what about the cabinets? If you’re wondering what the best way to attach the cabinets together is, it’s important to consider the type of cabinets that you’re using. Some cabinets may require different methods of attachment, such as using brackets or screws. Working with a professional can ensure that your cabinets are securely attached and your island remains stable. By taking the necessary steps to secure your island and cabinets, you can enjoy the benefits of a beautiful and functional kitchen without any worries of it tipping over.
Can I Use Any Type of Paint on the Cabinets?
If you’re planning on making a kitchen island out of base cabinets, you might be wondering if you can use any type of paint on the cabinets. The answer is yes, but with some important considerations. For example, if your cabinets are made of a glossy surface material like laminate, you’ll need to use a special primer before applying any paint. Additionally, you’ll want to choose a paint that’s durable and resistant to water and stains, especially if your island will be used for meal prep. With the right preparation and paint, you can transform your old cabinets into a stylish and functional kitchen island that will be the envy of all your friends and family.

Conclusion
In conclusion, making a kitchen island out of base cabinets is a great way to bring more storage and workspace to any kitchen. This project can be completed in a few short steps with basic tools and materials. While there are many options for the size and design of the island, it all starts with sturdy base cabinets that fit into place. Once you have the cabinets ready, you can finish everything off by installing countertops, shelves, drawers, and other features that make your island one of a kind. Give this project a go and you’ll have your own custom built kitchen island in no time at all. If you’ve been looking for an extra workspace or storage solution for your kitchen, don’t wait any longer! Now you know how to make a kitchen island out of base cabinets so get started today!
