Are you looking to give your kitchen cabinets a fresh, polished appeal? A glossy finish can transform your kitchen from dull and dated to modern and chic. With the right tools and a few tips, you can achieve a high-gloss finish that not only looks high-end, but also increases the longevity of your cabinets. The following guide will take you through the step-by-step process on how to make kitchen cabinets look glossy and shine.
What You Will Need
Before you begin, it’s important to gather all the necessary materials for this project. Here’s a list of what you will need:
- Sandpaper (220 grit)
- Primer
- High-gloss paint
- Paint roller and brush
- Polyurethane topcoat
- Tack cloth or microfiber cloth
Make sure to choose high-quality products for the best results.
Step-by-Step Process on How to Make Kitchen Cabinets Look Glossy
Now that you have all the materials and the right type of paint, it’s time to get started on making your kitchen cabinets look glossy.
Step 1: Clean and Prep the Cabinets
Firstly, it’s important to thoroughly clean your cabinets to remove any residue, grease, or dust that may interfere with the paint application. Use a mild detergent and warm water, then wipe the cabinets dry with a clean, soft cloth. Once the cabinets are clean, take your 220-grit sandpaper and lightly sand the surface of the cabinets. This will create a smooth surface for the primer and gloss paint to adhere to, ensuring a smoother and more durable finish. Remember to wipe away any dust created from the sanding with a tack cloth or microfiber cloth before proceeding to the next step.

Step 2: Choose the Right Gloss
Choosing the right gloss is crucial to achieving the perfect glossy finish. Typically, oil-based glosses offer a more durable and high-gloss finish, making them a great choice for kitchen cabinets that frequently come into contact with food spills and splatters. However, they can be more challenging to apply and may require a longer drying time. On the other hand, you may choose to use water-based glosses or polyurethane varnishes.
These types of glosses are generally easier to apply and have a quicker drying time, making them a convenient alternative. Regardless of the type you choose, ensure it aligns with your desired end result and the conditions of your kitchen.
Step 3: Apply Multiple Thin Coats
When applying the gloss, it’s crucial to use long, even strokes. This technique will help to prevent any brush marks or drip lines, resulting in a smoother and more professional looking finish. Be sure to follow the grain of the wood, as this will enhance the natural beauty of your kitchen cabinets. Apply a thin coat initially, let it dry, then lightly sand the surface with your 220-grit sandpaper. Wipe off the dust and repeat the process for at least two more coats. Remember, multiple thin coats are better than a single, thick coat as they dry faster, adhere better, and result in a more even and glossy finish.
Step 4: Sand Between Coats
After each coat of gloss, it’s important to make sure the surface is smooth for the next application. This is done by lightly sanding the cabinets with your 220-grit sandpaper, focusing on any drips or imperfections. The sanding will smooth out the previous coat, and ensure the next coat adheres properly. After sanding, use a clean tack cloth or microfiber cloth to wipe away any dust or debris.
This step is crucial as any leftover particles can get trapped in the gloss and disrupt the smooth, glossy finish. Once the surface is clean and smooth, you’re ready to apply the next coat. Repeat this process until you’ve applied all the necessary coats to achieve your desired level of gloss.
Step 5: Consider Adding Glaze
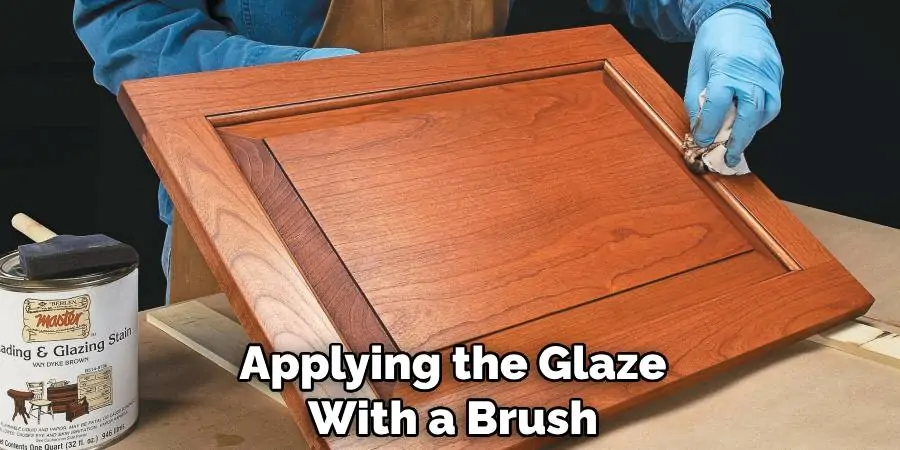
For a deeper and richer finish, consider adding a glaze over the gloss. A glaze can help highlight the details and contours of your cabinets, adding depth and character. Start by applying the glaze with a brush or rag in small sections. Ensure that you get the glaze into all the corners and details of the cabinet. Once applied, use a clean cloth to wipe away any excess, allowing the glaze to settle in the details of the cabinet door.
Be sure not to leave any puddles of glaze – the goal is to create subtle accents and shadows. This process can be time-consuming but the end result is often worth the extra effort. After the glaze is dry, consider adding a final top coat of polyurethane for an added layer of protection and shine.
Step 6: Let It Cure
After all the effort you’ve put into achieving that glossy finish on your kitchen cabinets, it’s important to let them cure properly. This process typically takes around 48 to 72 hours, depending on the type of gloss used and the conditions of your kitchen. During this period, avoid using the cabinets or placing any items on them, as this could potentially mar the fresh gloss. Allowing the cabinets to cure fully will harden the gloss and provide maximum durability.
After the curing period, you can then enjoy your newly refurbished, glossy kitchen cabinets, confident in the knowledge that they are better protected against the everyday wear and tear of kitchen use.
Step 7: Maintain Regularly
To maintain the high-gloss finish and keep your kitchen cabinets looking their best, regular cleaning is essential. Use a soft cloth and gentle cleaner to wipe away any spills, splatters, or fingerprints. Avoid using harsh chemicals or abrasive sponges as they could potentially damage the gloss finish. Instead, opt for a mild detergent or vinegar and warm water. If necessary, a soft toothbrush can be used to clean the corners and crevices of the cabinet doors.
Remember to always dry the cabinets thoroughly after cleaning to prevent any water marks or streaks. With regular maintenance, your glossy kitchen cabinets will retain their eye-catching luster and continue to be a stunning focal point in your kitchen.
By following these steps, you can easily transform your kitchen cabinets into glossy and stylish focal points in your home. With proper care and maintenance, your new glossy cabinets will continue to shine for years to come.

Frequently Ask Questions
What Makes Kitchen Cabinets Shine?
The type of gloss used and how it is applied are the key factors in making kitchen cabinets shine. Oil-based or water-based glosses can provide a glossy finish, with oil-based being more durable but requiring longer drying times. Proper application using multiple thin coats and sanding between each coat also contributes to achieving a shiny finish. Adding a glaze can also enhance the shine and add depth to the cabinets. Regular cleaning and maintenance can help maintain the shine of your kitchen cabinets. So, it is important to use a gentle cleaner and avoid harsh chemicals or abrasive tools when cleaning.
Can I Use Gloss Paint on My Cabinets?
Yes, you can use gloss paint on your cabinets to achieve a shiny finish. However, it is recommended to use a specific gloss for cabinets, such as oil-based or water-based gloss, that is designed to withstand the wear and tear of kitchen use. Regular gloss paint may not provide the same durability and protection for your cabinets. It’s always best to follow the manufacturer’s recommendations when choosing a finish for your kitchen cabinets.
Additionally, ensure proper preparation and application techniques are used for the best results. Finally, consider adding a glaze or final top coat of polyurethane for added protection and shine.
What Gloss is Best for Kitchen Cabinets?
The best gloss for kitchen cabinets depends on personal preference and the level of durability desired. Oil-based gloss provides a durable finish with great protection against scratches and wear, but it does require more time to dry between coats. Water-based gloss is also a popular and durable choice, with the added benefit of quicker drying times. Both types of gloss can provide a high-gloss finish for your kitchen cabinets.
It’s important to choose a gloss specifically designed for cabinets and follow proper application techniques for the best results. Consider adding a glaze or final top coat of polyurethane for added depth and protection as well. With proper care and maintenance, either type of gloss can keep your kitchen cabinets looking shiny and new for years to come.
Conclusion
In conclusion, there is no denying that a glossy finish can greatly enhance the overall look and feel of your kitchen. It adds a touch of elegance and sophistication while also making your cabinets more durable and easy to clean. By following the step-by-step process outlined in this blog post, you can transform your dull and old-looking cabinets into stunning glossy ones that will leave your guests in awe. So why wait? Get started on creating your own glossy kitchen cabinets today and elevate the style and functionality of your kitchen!
Remember to carefully choose the paint, properly prepare and sand your cabinets, apply several thin coats for a flawless finish, and allow ample drying time before reattaching hardware. With a little bit of patience and attention to detail, you can achieve professional-looking results without breaking the bank. Say goodbye to outdated cabinets and hello to a glossy new look that will make all the difference in your home. Trust me; you won’t regret it! Follow this guide on how to make kitchen cabinets look glossy, and impress everyone with your impeccable taste and DIY skills. Thank you for reading, and happy cabinet painting!
