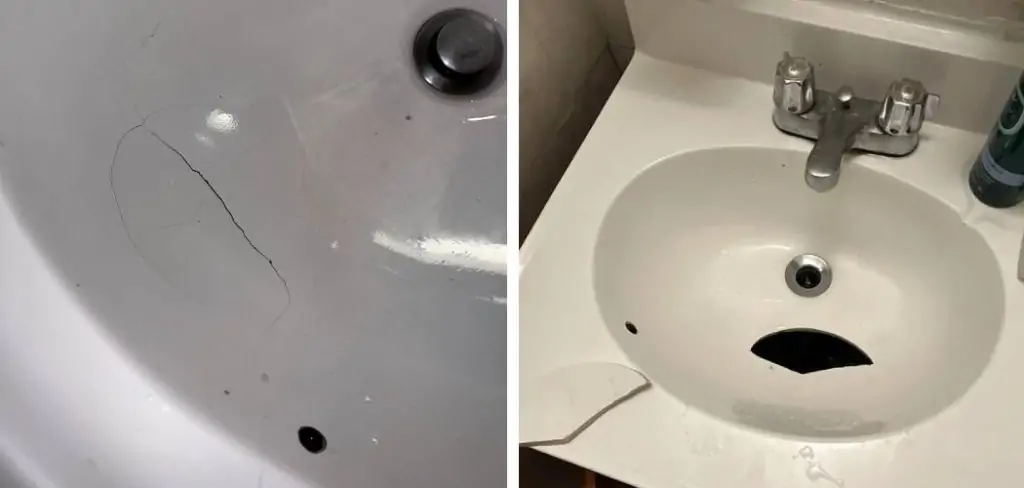
Porcelain sinks are a popular choice for many homeowners because of their durability and stylish appearance. However, accidents can happen, and you may find yourself with a hole in your porcelain sink. Don’t panic – this guide will provide you with step-by-step instructions on how to repair a hole in a porcelain sink.

How to Prevent Future Damage to a Ceramic or Porcelain Sink
Preventing future damage to your porcelain sink is key in ensuring its longevity and minimizing the need for repairs. Here are some tips to help you keep your sink in top condition:
- Avoid Dropping Heavy Objects: Porcelain sinks can be fragile and prone to cracking or chipping if heavy objects are dropped on them. Be careful when handling pots, pans, or other heavy kitchen items near the sink.
- Use a Sink Mat: Placing a sink mat at the bottom of your porcelain sink can help protect it from scratches and chips caused by dishes, utensils, or other sharp objects.
- Don’t Let Chemicals Sit on the Surface: Certain harsh chemicals found in cleaning products or hair dyes can cause damage to porcelain sinks. If you spill any chemicals, make sure to clean them up immediately.
- Be Mindful of Temperature Changes: Extreme temperature changes can cause porcelain sinks to expand or contract, potentially leading to cracks. Avoid pouring boiling water directly into the sink and try to use lukewarm water when washing dishes.
By following these simple tips, you can help prevent future damage to your porcelain sink and save yourself from needing to repair any holes or cracks.
Materials You Will Need
- Epoxy filler or putty
- Fine-grit sandpaper
- Acetone or rubbing alcohol
- Cleaning cloth
- Porcelain touch-up paint (optional)
- Protective gloves and mask (optional)
10 Steps Guide on How to Repair a Hole in a Porcelain Sink
Porcelain sinks are renowned for their classic look and durability, but what happens when they suffer a nick, chip, or—nightmare of nightmares—a hole? Before you think about giving in and replacing your whole sink, take a deep breath. With a little elbow grease and the right tools, you can repair that damaged porcelain sink yourself. Here are the 10 crucial steps you need to follow to restore your porcelain sink to pristine condition — and save a pretty penny in the process:

Step 1: Assess the Damage and Gather Your Supplies
First things first, assess the extent of the damage. Is it a hairline crack, a small chip, or a hole? Depending on the size and location of the damage, you may need different tools and materials. For general repair, you’ll likely need:
- Epoxy Porcelain Repair Kit
- Safety gloves
- Safety goggles
- Masking tape
- Sandpaper (fine grit)
- Alcohol
- Cotton swabs
- A clean cloth
Step 2: Clean the Area Thoroughly
Porcelain is notoriously difficult to adhere to, which makes cleaning the area thoroughly a critical step. Use alcohol to remove any dirt, grease, or soap scum. Allow the area to dry completely to ensure that the repair material bonds properly.
Step 3: Prepare the Epoxy Mix
Follow the manufacturer’s instructions on your epoxy porcelain repair kit to mix the solution. Be precise with the ratio and do not mix more than you can use in the recommended time frame, as epoxy can harden quickly.
Step 4: Apply the Epoxy
Use a gentle hand to apply the epoxy to the damaged area. If it’s a small chip or crack, apply the epoxy using a toothpick or a similar tool for accuracy. For larger repairs, a putty knife may be necessary. Fill the damaged area with epoxy, ensuring all parts of the surface are covered.

Step 5: Level the Epoxy Repair
After applying the epoxy, you’ll need to level it with the surrounding sink surface. A putty knife or a plastic card can be used to scrape away the excess epoxy. Smoothly spread the epoxy across the damaged area until it is flush with the sink surface.
Step 6: Wait for the Epoxy to Cure
Once the epoxy is level, resist the urge to touch it. Allow the epoxy to cure as per the manufacturer’s instructions, which could be anywhere from a few hours to a whole day. Curing times will be affected by factors like humidity and temperature, so be patient.
Step 7: Sand Down the Repaired Area
Use fine-grit sandpaper to sand the repaired area gently. This step is critical in ensuring the repaired section blends seamlessly with the rest of the sink. Be careful and go slowly—sanding too hard or too quickly can damage the new epoxy.
Step 8: Clean and Inspect
Wipe down the sanded area with a damp cloth to remove any dust from the sanding. Inspect the repair. It should be smooth to the touch and difficult to distinguish from the rest of the sink. If it’s not quite right, you may need to reapply the epoxy and repeat the previous steps.

Step 9: Repeat If Necessary
Sometimes, a repair doesn’t take the first time. If you notice any issues with the first epoxy application after sanding, repeat the process until you are satisfied with the result.
Step 10: Seal and Polish
For that final touch, consider using a porcelain sealant and polish. Apply the sealant to the repaired area and use the polish to bring back the shine of your newly restored porcelain sink. This step will also help protect the repaired section from future damage and staining.
Congratulations, you’ve successfully repaired a hole in your porcelain sink! Remember, patience and precision pay off in DIY projects, so take your time and follow the steps carefully. Your restored sink can once again be the elegant centerpiece of your bathroom or kitchen. Enjoy the satisfaction of a job well done!
5 Things to Consider Before Attempting to Repair a Hole in Your Porcelain Sink
While repairing a hole in your porcelain sink is possible for many homeowners, there are some things to consider before attempting the task:
- The size and location of the hole – Smaller holes and chips are more manageable to repair than larger ones or those located near the edges of the sink.
- Your experience level and comfort with DIY projects – If you have never attempted a repair like this before, it may be best to hire a professional.
- The cost of the repair kit and tools versus hiring a professional – Weigh the cost of purchasing the necessary materials against the cost of hiring a professional for the repair.
- The time and effort involved in the repair process – Be prepared to spend several hours on the repair, including waiting for the epoxy to cure.
- The potential for further damage – If you are unsure about your ability to complete the repair successfully, it may be best to leave it to a professional to avoid causing more damage.
Frequently Asked Questions
Can You Fill a Hole in a Porcelain Sink?
Imagine gazing upon your pristine porcelain sink, the very emblem of your stylish and immaculate bathroom, only to have your eyes fall upon an unsightly blemish—a small hole tarnishing its otherwise unblemished surface. But before despair takes hold, know that this is not the end for your cherished sink.
With the right materials and a touch of DIY spirit, you can mend the hole and restore your porcelain to its former glory. In this guide on how to repair a hole in a porcelain sink, we’ll walk you through each meticulous step, ensuring that you are equipped with the knowledge to patch up your porcelain seamlessly and maintain the elegance of your bathroom’s sanctuary.

How Do You Fix a Hole in Porcelain?
Fixing a hole in porcelain might initially seem daunting, but with the appropriate tools and a steady hand, it’s a task well within the grasp of your average DIY enthusiast. The process essentially involves cleaning the damaged area, preparing it for repair, filling it with a suitable epoxy or porcelain filler, and then carefully sanding and polishing the repair until it blends seamlessly with the surrounding material.
Throughout this guide, we’ve detailed each step to ensure clarity and ease of understanding, empowering you to restore your porcelain to its pristine condition. Remember to take your time and approach each step with precision to achieve the best results. With patience and attention to detail, you can achieve a repair that’s both durable and aesthetically pleasing, preserving the beauty and functionality of your porcelain items for years to come.
Can You Patch a Porcelain Sink?
Yes, you can patch a porcelain sink. In fact, it’s often the preferred method for repairing small holes and cracks in porcelain surfaces. The key to successfully patching a porcelain sink is using the right type of epoxy or filler designed specifically for this purpose. Follow the steps outlined in this guide to ensure a successful repair that will restore your sink’s original beauty.
Conclusion
With this guide, you have all the information and steps needed for how to repair a hole in a porcelain sink. Remember to take your time, use the right materials, and follow each step carefully for the best results. Don’t let a small accident or damage ruin the beauty and functionality of your porcelain sink – with some DIY skills, you can restore it back to its former glory. So, grab your tools and get ready to tackle any repair that comes your way!
Keep exploring other DIY projects and keep honing your skills – you never know when they might come in handy next time! Remember, with a little patience and precision, you can accomplish anything you set your mind to. Thank you for reading this guide, we hope it has been helpful and informative. Good luck with your repair! Happy DIYing!
